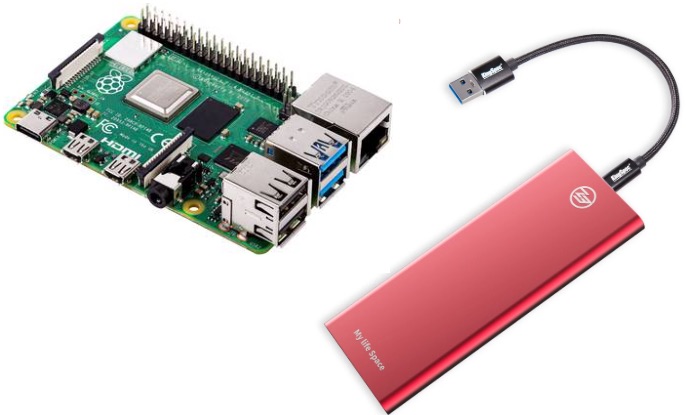
Update 2024: Het programma `Raspberry Pi Imager` kan rechtstreeks op een USB-drive het PIOS image schrijven. Hiermee vervalt onderstaande stap 6 om een SD-card te kopiëren naar een aangesloten USB-drive op De Raspberry PI. — Sinds april 2021, is het makkelijker geworden om een Raspberry PI 4 van USB-SSD op te starten. Dat heeft vele
Een OLED schermpje op de Jetson Nano
Aanleiding Adafruit heeft een leuk OLED-board voor op de Raspberry PI, de Adafruit PiOLED. Deze kan ook op de Jetson Nano header geplaatst worden. De constructie is zo simpel dat ik het zelf gemaakt heb, al heeft me dat een herbouw gekost: 1ste keer was OLED gesoldeerd op de print, hetgeen géén succes was (display was

Raspberry PI – installatie van OpenCV met broncode
Installatie van OpenCV op Raspberry PI met de broncode van OpenCV. Configuratie:• Raspberry PI met 120GB SSD: Buster, armv71 (32-bit).• OpenCV versie 4.5.2 (feb’21). Installatie volgens de Terminal instructies van PyImageSearch. Ik heb de installatie van OpenCV met compileren van de broncode uitgevoerd. Volgens PyImageSearch zitten daar enkele interessante algoritmen bij (Non-Free algorithms). De hele
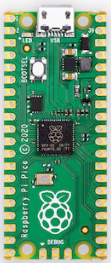
Maker PI PICO, een mooi basestation voor de microcontroller Raspberry PI PICO
De microcontroller Raspberry PI PICO is de eerste microcontroller van de Raspberry PI Foundation en bevat tevens een eigen ontwikkeld System-On-Soc, de RP2040. Er is al veel geschreven over deze microcontroller, voor meer details: zie de Getting Started pagina. Er zijn diverse SDK’s (software development kits) waarmee de microcontroller geprogrammeerd kan worden: MicroPython (pdf), CircuitPython,
Microcontroller USB-Serial port op MacOS Big Sur
MacOS Big Sur (macos 11.*) heeft vele veiligheidsaspecten ingebouwd. Vooral op gebied van drivers is het zoeken naar een voor MacOS Big Sur geschikte programmatuur. De Raspberry PI PICO is een microcontroller waarop software te maken is met MicroPython, CircuitPython of C/C++. Ik beperk mezelf tot de eerste twee SDK’s. In eerste instantie is er
Technical Note: Using a Python virtual environment in Jupyter notebooks
When testing or using various Python packages, the risk is that the new packages mangle the current Python installation, or, are in conflict with the current Python installation. Python virtual environments are an answer to solve this kind of problems. A Jupyter notebook uses a “base” installation when the Anaconda distribution is installed. How to
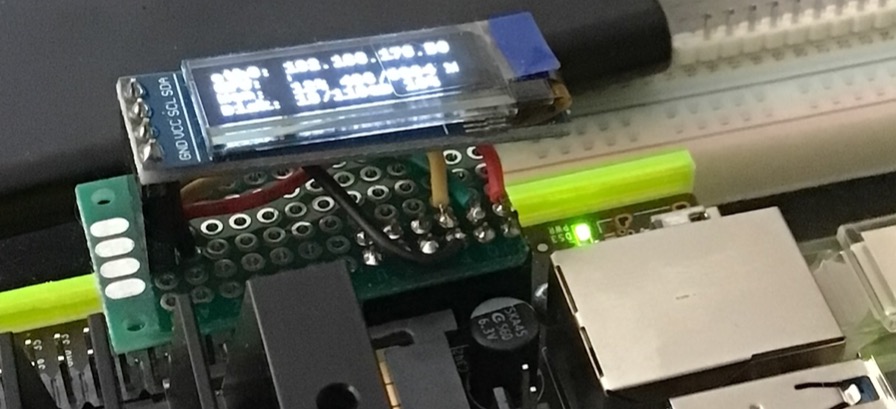
WeatherStation: temperature and humidity on OLED display
At last, I’m able to continue with the Weatherstation project. In this case, getting and displaying temperature and humidity from the SHT30 sensor on the OLED display in a first version. Both devices are WeMOS shields, placed up and besides the WeMOS D1 mini. Result on the OLED-display:Hardware considerations. Hardly difficult. The SHT30 shield and
Pycharm – ‘ModuleNotFound’ error and setting a Python Interpreter
Pycharm – a few notes not to forget: Specify default ‘Python Interpreter’ for all projects: File >> Default Settings: select ‘Project Interpreter’, or, specify new Python Interpreter using ‘add local…’ combo-selection, next to it ==> selected ‘python 3.6 (anaconda)’ from displayed listing. ‘ModuleNotFound’ error: Add a package to the project: File >> Default Settings: select
CH340/341 serial-USB driver panic on MacOS 10.13 High Sierra
Have I updated my MacOS from El Capitan (10.11) to High Sierra (10.13) at last, I’ve got a kernel panic when I connect an Arduino Nano to it! Connecting a WeMOS D1 mini, or LOLIN32 Lite, will have same problem. Turns out, its not a hardware problem (pfff), but a driver-problem: the currently installed CH340/341

project Weatherstation: intermezzo -hardware considerations
As written in previous episode, the weatherstation contains WeMOS D1 mini and several mini-shields. Each shield communicates with the ESP8266 via GPIO-pins. Tabel 1 summaries which WeMOS mini pins (D1.. D8) are used by WeMOS shields. I also added some RobotDyn-shields, which I intent to use. Table 1 shields comptability We see the Buzzer shield