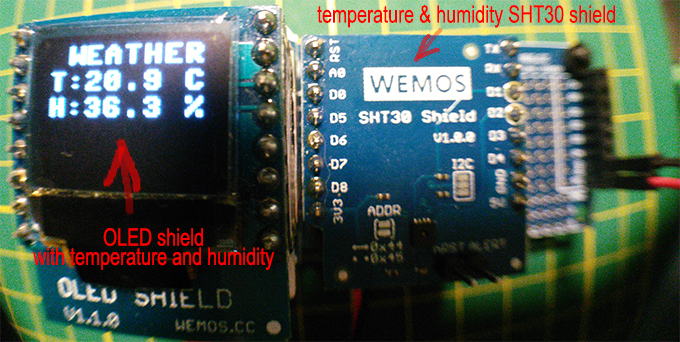
At last, I’m able to continue with the Weatherstation project. In this case, getting and displaying temperature and humidity from the SHT30 sensor on the OLED display in a first version. Both devices are WeMOS shields, placed up and besides the WeMOS D1 mini.
Result on the OLED-display: Hardware considerations.
Hardly difficult. The SHT30 shield and OLED shield can be placed, properly oriented, on top of other shields or on WeMOS D1 mini microcontroller. See a previous post of project WeatherStation.
Note: It is recommended to place the OLED on the top of a stack, same with SHT30 shield.
SHT30 communicates to the microcontroller via I2C. The shield can have one of two I2C addresses via a soldering-jumper on the shield. The default I2C-address is 0x44, which is used. More details on WeMOS SHT30 shield.
The OLED shield communicates also via I2C with the microcontroller. Its default I2C address is 0x3c (hex value). The dimensions of the OLED display are 64 x 48 pixels, and the OLED-controller chip is SSD1306. More details on WeMOS OLED shield.
Software considerations
SHT30 sensor communication is I2C, address = 0x3c (hex), and here is a MicroPython class SHT30, which I’ve used.
WeMOS D1 mini: I2C pins D1 (=SDA) and D2 (=SCL) are used. D1 = GPIO4, D2 = GPIO5. The GPIO-numbers have to be used in the programming code.
For the OLED chip ssd1306 a builtin MicroPython module ssd1306 is available (MicroPython version 1.93+). So, no separate download is necessary. I’ve made a class Display, which is a wrapper for the ssd1306 module, following the Decorator design pattern. By making such a class I’m able to enhance the module ssd1306 without changing this module.
The main program is programmed as a class WeatherStation, which is the most proper way to object oriented progrmaming (“OOP doesn’t know ‘main'”), call me nerdy 🙂
The MicroPython version is 1.9.3, since the last post of the project. I’ve upgraded the MicroPython firmware of the WeMOS D1 Mini, using the latest 1.9.3 release version (dated 1th November 2017). See micropython ESP8266 downloads. Instructions to download and flash the firmware to the ESP8266 microcontroller can be found here.
In order to transfer Python files from/to laptop to/from WeMOS D1 mini, a very handy tool ampy is used. See here for details about installation and using the tool. Other tools exists, but ampy does do its job. Thanks Tony DiCola!
Software architecture
IN PROGRESS – Updated soon.
Code samples
In Micropython a file main.py is used to startup a particular program. Code to startup a WeatherStation object and execute a temperature and humidity measurement is as follows:
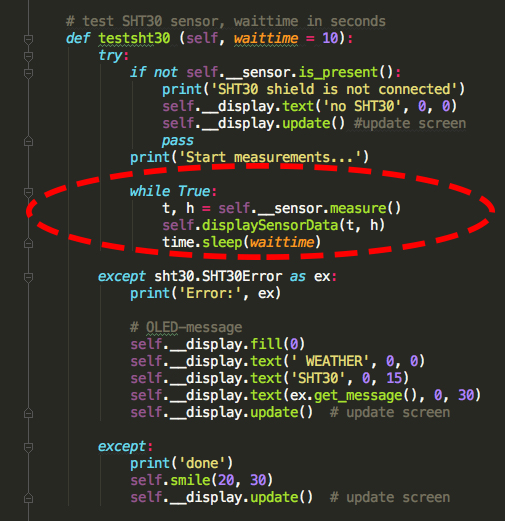
The method testsht30() is my first version of the WeatherStation. The crucial actions are (see the circled code in figure below): (1) get the measurements from the sensor, (2) display the temperature and humidity, and (3) wait a certain time (sleep) before repeating the cyclus.
 These repeated actions are guarded by an exception-catch structure (
try…except) to display errors from the SHt30, and to finish program when its interrupted by, for example, Ctrl-C key combination the keyboard.
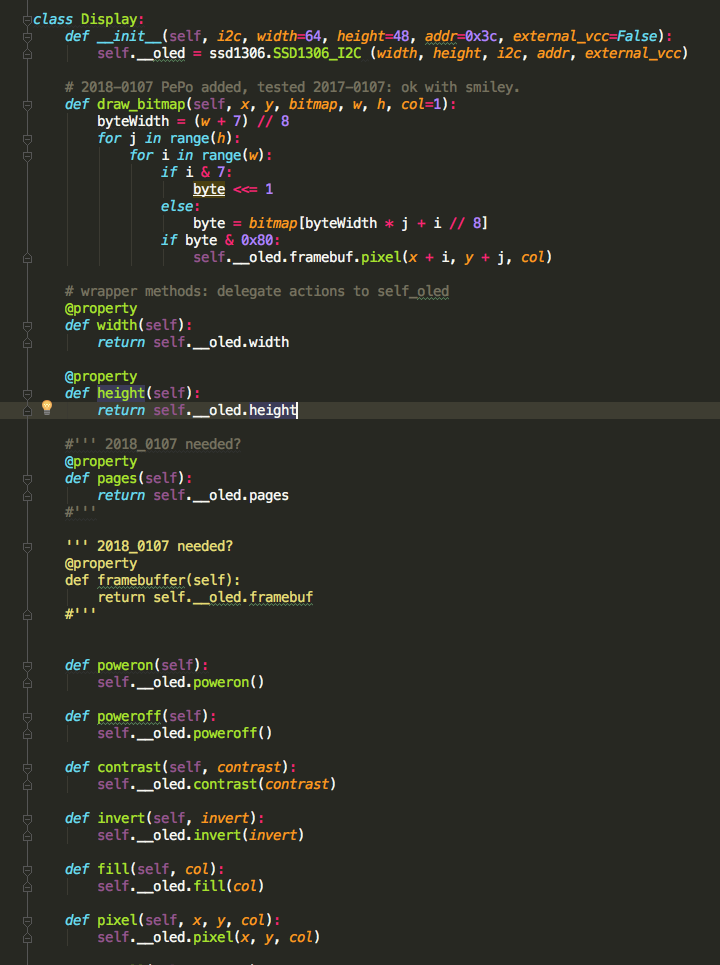
The class Display is a software-wrapper (also called Decorator) for the module ssd1306 and implemented in the Python file oled1306.py. See figure below. The module ssd1306 uses I2C protocol to command the chip on the OLED shield. I’m using this module without going in the details how it works. Something for a next time to dig into the I2C-protol.
The class Display mimics the methods of the ssd1306 module, i.e. it delegates the same methods to a ssd1306 object, named __oled. Naming convention in Python is used, which means that the two underscores in front of the name oled indicates that its a private attribute of the class and not allowed to be accessed by code outside the class scope. Using the attribute outside the class scope will raise an exception, and the program is terminated.
 I’ve made several enhancements in the class
 Display by using sample code from other people (sources : see in the code files):
- method
update()preferable to be used instead show(). For an OLED the sequence of statements is: first fill a memory buffer (namedframebuffer) with multiple drawing actions (fill(),text()..), and then update the physical display with one statement (methodshow()). - method
active()to power-on or power-off the OLED display for an efficient battery usage. I’ve to look again if it has the same intention as methodpoweroff()andpoweron().
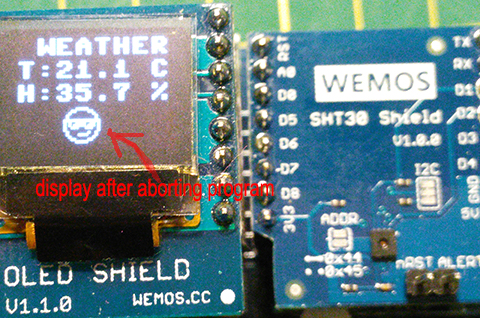
When the program is stopped, a smiley is displayed below the measurements:
 The full code for the class
 Display and WeatherStation is provided on my Github. De code class SHT30 can be be found here.
